NRRA Newsletter: January 2019

5 Factors for Successful Longitudinal Joint Construction
It’s easy to say that quality of work is the key to a good longitudinal joint, but good construction is a combination of specific factors. A recent report completed by the NRRA Flexible Team digs into those specific factors and outlines some elements you should focus on. The DOTs that contributed to this report include:
- California
- Illinois
- Michigan
- Minnesota
- Missouri
- Wisconsin
“The longitudinal joint is the weakest link in the chain” said John Garrity, bituminous engineer for MnDOT’s Materials and Road Research Group. Density is key to pavement durability, he said, and it’s difficult to maintain density across the mat at that place where the first and second pass of the paver meet—the longitudinal joint. Here are some factors to double check during construction.
Straight Lines: This may sound like a no brainer, but you need to have a straight reference line for the paver to follow during the first pass. The report suggests a simple stringline for the reference line. Whatever you use to establish this line, don’t forget to do it.
Steel First: When the rollers start compacting the mats, the report recommends that you begin with a steel  roller (rather than rubber) with a 6-inch overhang from the hot side of the mat. The issue with asphalt compaction, says Garrity, is when you have an unconfined edge, the asphalt will want to move laterally at that edge and then you lose density. Rubber rollers on an unconfined edge will mush out the mix if positioned too closely to the edge.
Overlap: Make sure, during the second (adjacent) paver pass, that the screed is overlapping the first paver pass by 1-1.5 inches. Moreover, the overlap should be about ¼ inch higher than the adjacent mat before the rollers compact the joint.
Roller Placement: There are two schools of thought on this. The two-pass method puts the first roller pass on the hot mat and six inches from the joint. On the second pass, the roller goes directly over the joint, essentially pinching the material in place.
The other method only does one pass with the roller 6 inches over the joint from the hot mat side.
Joint Shape: The six states diverge on how to construct the actual joint. One method, preferred by all the states except Minnesota and Missouri, is called the Notched Wedge Joint. With this joint, the screed has a form attached on the end so it shapes a notched, tapered edge on the first pass. This taper is about 12 inches wide depending on lift thickness. On the second paver pass, the screed overlaps the first paver pass and fills in the notched wedge.
The other joint is called the Maryland Joint. It is a butt joint and therefore neither notched nor tapered. It’s just a straight edge abutted up against another straight edge with enough overlap to ensure the best density when compacted.
The importance of density at the joint cannot be stressed enough, says Garrity, because the less density in the longitudinal joint, the more porous it is. That means water can get in the joint and reduce the performance of the material. Cracks in the longitudinal joint are made even worse in multilane roads where cars change lanes a lot. When it rains, these cars go over the joints and push water into cracks “like a pressure sprayer” he says.
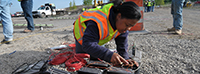
As an added precaution, both Illinois and Minnesota apply a longitudinal joint adhesive before paving the adjacent paving pass in order to help keep the water out of the joint. Photos in the report show how these joint sealers are performing.
What to do with a gravel road
We don’t talk about gravel roads very often in our alliance. We are all about asphalt and concrete and base and grade, but according to The Federal Highway Administration (FHWA) there are over 1.4 million miles of unpaved roads in the United States (2012).
Back in 2016, John Brunkhorst, county engineer for McLeod County, Minnesota and NRRA member, decided to test out some ideas he had about improving unpaved roads. McLeod County 54 was a 3 mile unpaved road (gravel), that served many residents from a nearby lake. These residents complained about it a lot. Since it was a mile away from the trunk highway system, he guessed it would never be paved due to its use. Moreover there wasn’t enough money to do a complete road construction.
John decided one cost effective solution involved stabilizing the base aggregate layer and then putting a chip 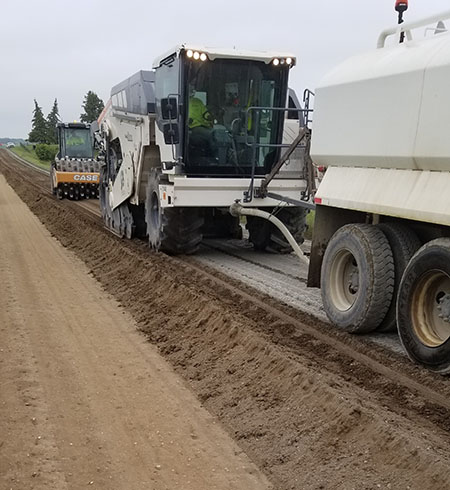 seal on top of it followed by another chip seal in the following year.
In 2013, the first attempt at upgrading this gravel road involved tiling the centerline of the road and stabilizing one of the three miles with an asphalt emulsion. That didn’t work and it started breaking up after a year. The next year, the county tried an eight inch cement stabilization on all three miles of the gravel road creating a stronger aggregate base that was then weatherproofed with a chip seal surface.
So far, Brunkhorst reports there are a lot more cars driving this road now than when it was unpaved. The surface, he says, is showing some issues with loss of some of the chip seal surface, which is probably due to quality of work issues. His team is still treating it like an unpaved road, keeping minimal down pressure when snow plowing. In the spring they are going to look at some corrective actions to repair the seal coat, which will likely be done with a scrub seal and another layer of chip seal.
This is a project that Brunkhorst is keeping his eye on for a number of reasons. If it works it could become a cost effective solution for many roads in Minnesota and across the nation. How cost effective?
Brunkhorst estimates that his cement-stabilized road is about $150 K per mile, whereas an HMA would cost between $400 and $500 K per mile.
Base Stabilization Guide: A Roadmap for Implementation
There are some foundational principles in pavement engineering, and one of them is: Your road is only as good as its base.
A few years back a task force got together to create a guide for base stabilization. The report came out about a year ago in December 2017, and its title was Base Stabilization Guidance and Additive Selection for Pavement Design and Rehabilitation. Many NRRA members were involved in the TAP including the Local Road Research Board, MnDOT, American Engineering Testing and Braun Intertec.
The demand for this research came about because significant improvements have been made to base stabilization in terms of:
- Design specifications
- Methods
- Stabilizing additives
- Equipment for distribution and blending of additives
The trouble with a report like this, explains co-author Renae Kuehl of SRF Consulting, is addressing the numerous proprietary products available for base stabilization. Often the audience for this kind of report wants reviews and recommendations so they know what product to choose and what to avoid.
“Base stabilization is the future of asphalt road rehabilitation. This guidebook brought common language to the topic of base stabilization and provided a common approach to its use. It will be helpful for road owners who are not experts but want more information on base stabilization and what it can do for their roadways.”
--Ben Worel, chair of the TAP for the project, Research Operations Engineer for MnDOT
That gets very complicated because public agencies like MnDOT and the LRRB do not endorse proprietary products. It’s even more difficult when the market for base stabilizing products is vast and growing and changing all the time. Instead, explained Kuehl, they created a section in the report with a list of questions to ask vendors about their base stabilizing products. For instance, one of the questions is: “Do you have lab testing results available to verify your product’s effectiveness?”
 The section of the report that might be most useful is a step-by-step process for implementing successful base stabilization. It’s a four-step guide for assessing the roadway, choosing an additive, designing the mix and constructing the base.
Finally, there was a case study of research done at MnROAD involving three 500-foot test sections. They had been constructed originally in 1993 and were in rough shape. In 2007 they did a stabilized full-depth reclamation (SFDR) on these sections using an emulsion stabilizer and topping it with 3” of HMA. It was on a very heavily traveled section of I-94. The predicted design life was five years or about 3 million ESALs. In 2017, ten years later, these sections outperformed the expectations by a factor of two—6 million ESALs—with no reflective cracking.
Research Pays Off February
Our webinar series on February 19, at 10 a.m. (CT) will be about the new Guide for Concrete Pavement Distress Assessments and Solutions by Iowa State University's National Concrete Pavement Technology Center.
Recommended Additional Pavement Research Resources
- Improving traffic data inputs for mechanistic-empirical pavement design software (Michigan DOT)
- Commercial Production of Non-Proprietary Ultra High Performance Concrete (Michigan DOT)
- Concrete Joint Sawing Practices and Impacts on Durability (Wisconsin DOT)
- Selecting Structural Synthetic Fibers for Use in Thin Concrete Overlays (Minnesota DOT)
2019 NRRA Pavement Workshop: We have an App
Please plan to attend this year's NRRA Pavement Workshop. The latest news is:
- We have an app for the workshop.
- We've added an extra day. May 21 will showcase "BIM for Pavements... Asset Management, Planning,
Design and Construction." - The agenda, so far, is here.